What is x-ray fluorescence testing?
In a reboot of the series provided by the Birmingham Assay Office, Mark Malin, who has worked at the Birmingham Assay Office since 1978, explains the history and the application behind XRF testing.
The change in the UK jewellery market during the past 15 years has been dramatic and irreversible. Items made outside the UK now outnumber UK manufactured articles by about nine to one and there has been a significant increase in silver and mixed metal articles and those which are hollow or very lightweight.
Synthetic and enhanced gemstones are increasingly prevalent and there is increasing consumer product safety legislation applicable to jewellery and other accessories. Those who are servicing the industry, including the assay offices and gem labs have had to respond. This new series by the Birmingham Assay Office (BAO) investigates the technology now commonly in use in servicing the needs of the jewellery industry.
THE HISTORY
One of the first advanced technologies to be explored, developed and introduced was X-Ray Fluorescence (XRF) testing, to replace the traditional assay methods of cupellation and titration for silver and gold. We began exploring the use of XRF technology in the late 1990s.
Whereas we had previously received a good proportion of work from local manufacturers in a un-finished or semi- finished state, we were seeing more and more finished items coming in for hallmarking, many submitted by importers. The traditional sampling methods for assay require us to scrape a tiny sample from a quantity of items in the batch for testing by cupellation for gold, titration for silver or ICP for platinum.
On a semi-finished item we would receive casting sprues or offcuts from the item to test, or the small amount of damage caused by scraping could easily be restored during finishing. However on a finished item scraping could potentially render the article unsaleable if the customer had no opportunity to refinish it. The assay offices were therefore required to find a less destructive, but equally accurate, way to sample and assay in order to provide an appropriate service.
We undertook experimental work with a number of different potential suppliers. Reference samples were submitted and compared but at the outset many systems could not meet the criteria, particularly in terms of accuracy. Research and development driven by the obvious market demand and supported by advancing computer technology finally resulted in a breakthrough.
The progress in the physical technology of the XRF and the necessary IT functions delivered a system which could handle much more complex matrices, delivering accurate results. The BAO then subjected the new technology to rigorous tests, comparing results from hundreds of samples to check its stability, consistency and accuracy before they brought it into general use. Other assay offices were also introducing the new technology and XRF testing was approved as a satisfactory method of assaying by the British Hallmarking Council. The technology is now widely used by assay offices throughout the world.
THE TECHNIQUE
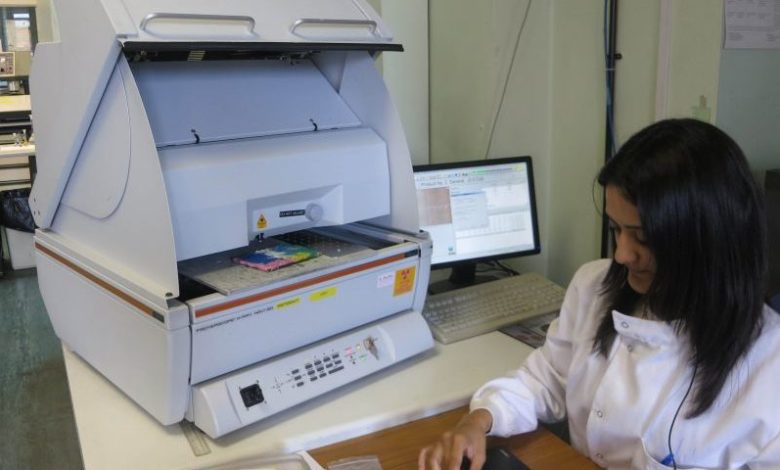
The technique is based upon a directed column of X-ray beams knocking an electron out of the innermost shell of the atom, causing displacement of other electrons. The movement of the electrons creates a small amount of energy which is what is detected by the instrument.
The energy is characteristic of the metal element that has generated it and the XRF collects the information and separates the energy into different channels, related to the position of the elements in the spectrum. The instrument has a library of a selection of pure elements which it uses as points of reference when identifying the elements in the unknown jewellery items or samples.
For regular hallmarking assay applications the user will select the appropriate programme for the standard to be tested, for example 9ct gold. They will use their experience to interpret the result and if any unexpected reading should appear they will carry out further investigation to identify why the variance has occurred.
There are still occasions when XRF tests do not give a clear result and the article may have to be scraped slightly in order to obtain an accurate result. These are usually due to contamination of the results by plating or residues left behind during the manufacturing process, and are the exception rather than the rule. XRF is therefore most often a non-destructive assay method. It also has the benefit of being quicker and more environmentally friendly than the energy and chemical hungry traditional methods of cupellation and titration, which are still used as reference methods.
However, assay by XRF requires no less expertise than the traditional scraping, touch acid testing and cupellation method. Previously samplers needed experience of acid reactions and dexterity and skill in sampling with least possible damage to the item. They have had to be totally re-trained to understand the importance of presenting the article to the XRF correctly to obtain an accurate result and also to recognise questionable results.
The target area needs to be flat so that the X-ray beam bounces back at the right angle for the deflector to capture all the energy emitted. The XRF machine does a good part of the work but an experienced user who understands the technology and how to interpret the readings is crucial for an accurate result. The operators have played and still play a very important role in enabling the BAO to cope with the wide range of new and complex alloys received. Results are regularly checked and cross referenced to ensure accuracy.
The introduction of the new technology improved customer service as it reduced the amount of scraping required but it did raise a few questions too. “Customers were most indignant they weren’t getting their gold back. When articles were assayed by cupellation we always used to return the cornet of fine gold which resulted from the assay back to the customer with their goods.
Of course this didn’t happen once we stopped scraping and it took a while and a lot of explanation for customers to understand that all the gold was still there in their articles, untouched.
THE OTHER USES
Outside hallmarking, XRF technology is used by the laboratory in two ways. The equipment is even more sophisticated with a stronger electric current to give an in-depth analysis. It is used as a ‘sanity check’ on samples submitted for precious metal analysis to give an estimated composition to determine the most appropriate reference method to use in order to deliver an accurate result. XRF is also used to determine plating thickness and composition of more complex alloys which may require lengthy investigation by an experienced operator.
The capabilities of the XRF equipment used by assay offices are far superior to that of the handheld devices in use by retailers. While these devices are useful in providing a guide to the approximate composition of an article they should always be used with caution as they are difficult to calibrate – resulting in a wide ‘drift’ of results. Particular care should be taken when assessing items with curved surfaces which do not make equal contact with the ‘window’ of the machine. As with most technology its usefulness relies upon the expertise of the user.
By Mark Malin. This article first appeared in the March 2015 issue of Jewellery Focus